Sheree McKee
sewfabsew.blogspot.com
10 steps to Prep
- Sew in short sessions, sometimes over several days
- Make multiples at a time
- Fuse front base fabrics to stiffener or stabilizer filler ahead of time
- Layer or build the front theme design
- Embellish front with FLAT fibers and trims
- Apply backing by fusing or sewing
- Add final dimensional items to fronts
- Trim to size 4"x6"
- Overcast edges or add wrapped borders
- Sign and label back, add postage and address

1. SEW A LITTLE BIT EACH DAY!
That's what works best for me, 30-45 minutes is easy to squeeze into most hectic schedules. I am a morning person, sometimes sewing at 4:30 am before the birds are singing!
2. MAKE MULTIPLES:
I seem to have a sewing construction order that works for me. Since most of my swaps will trade two to four fabric postcards, I tend to make three at a time. If I like the end results, then I'll make a few more.
3. FUSE FRONTS:
I try to keep several fabric strips cut and ready for upcoming projects by tearing them into 5" wide strips, crosswise. I also prepare full-width cuts of stabilizer approximately 5" wide. Sometimes I take a random 30-45 minutes to select fabric, cut, fuse and cool it, knowing I will sew it on another future date.
 |
| Yellow template is 4"x6" size |
I like the 20" width of Peltex 71F stabilizer. The Peltex has a one-sided, rough fusible texture. I use a protective non-stick mat underneath the Peltex, to protect my ironing surface and I use a cotton press cloth on top of my theme fabric.
 |
| My favorite stiffener or filler |
TIP: Always allow the fused layers to cool before removing them from the ironing board. If you remove the steamed stabilizer too early, or allow it to bend then you can set an unwanted curve or distortion into it.
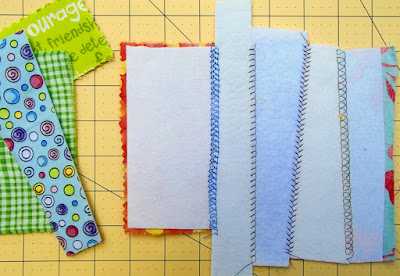
After cooling, cut into three temporary sections approximately 5" x 6 1/2" as seen below.
 |
| Making Multiples |
4. LAYER OR BUILD the front theme design with additional pieced or appliqued fabrics.
TIP: Since I often machine stitch through these add-on layers of fabric, I try to use a white bobbin thread. This will minimize any show-through thread stitches on the backside when the backing is added. Most fabric postcard backs are muslin or a light-colored solid fabric to emphasis hand written text. Using dark bobbin threads can interfere with the readability.
5. EMBELLISH FRONT with FLAT fibers and trims
Too much dimension can hinder the ability to fuse your backing on
6. APPLY BACKING by fusing or sewing
I try to keep dimensional objects at least 3/8"-1/2" away from edges. This allows my presser feet plenty of space to overcast outer edges in the final stages.8. TRIM all four sides to 4"x 6"
Most often I use a rotary cutter, and I'm very fond of the scallop wheel shape!
9. OVERCAST EDGES or add wrapped borders
10. SIGN, DATE, STAMP, ADDRESS the back
Use special fabric markers or fine point Sharpies or Micron pens
| Identi-pen at Dharma Trading |
| sakuraofamerica.com |


