Sheree McKee
sewfabsew.blogspot.com
Do you appreciate texture and dimension in your textile projects? I do, and I often think about methods to add surface design to my postcard creations. These Fabric Postcards (FPC) were fun to make using an Origami technique for folding and manipulating cotton fabric into flowers.
 |
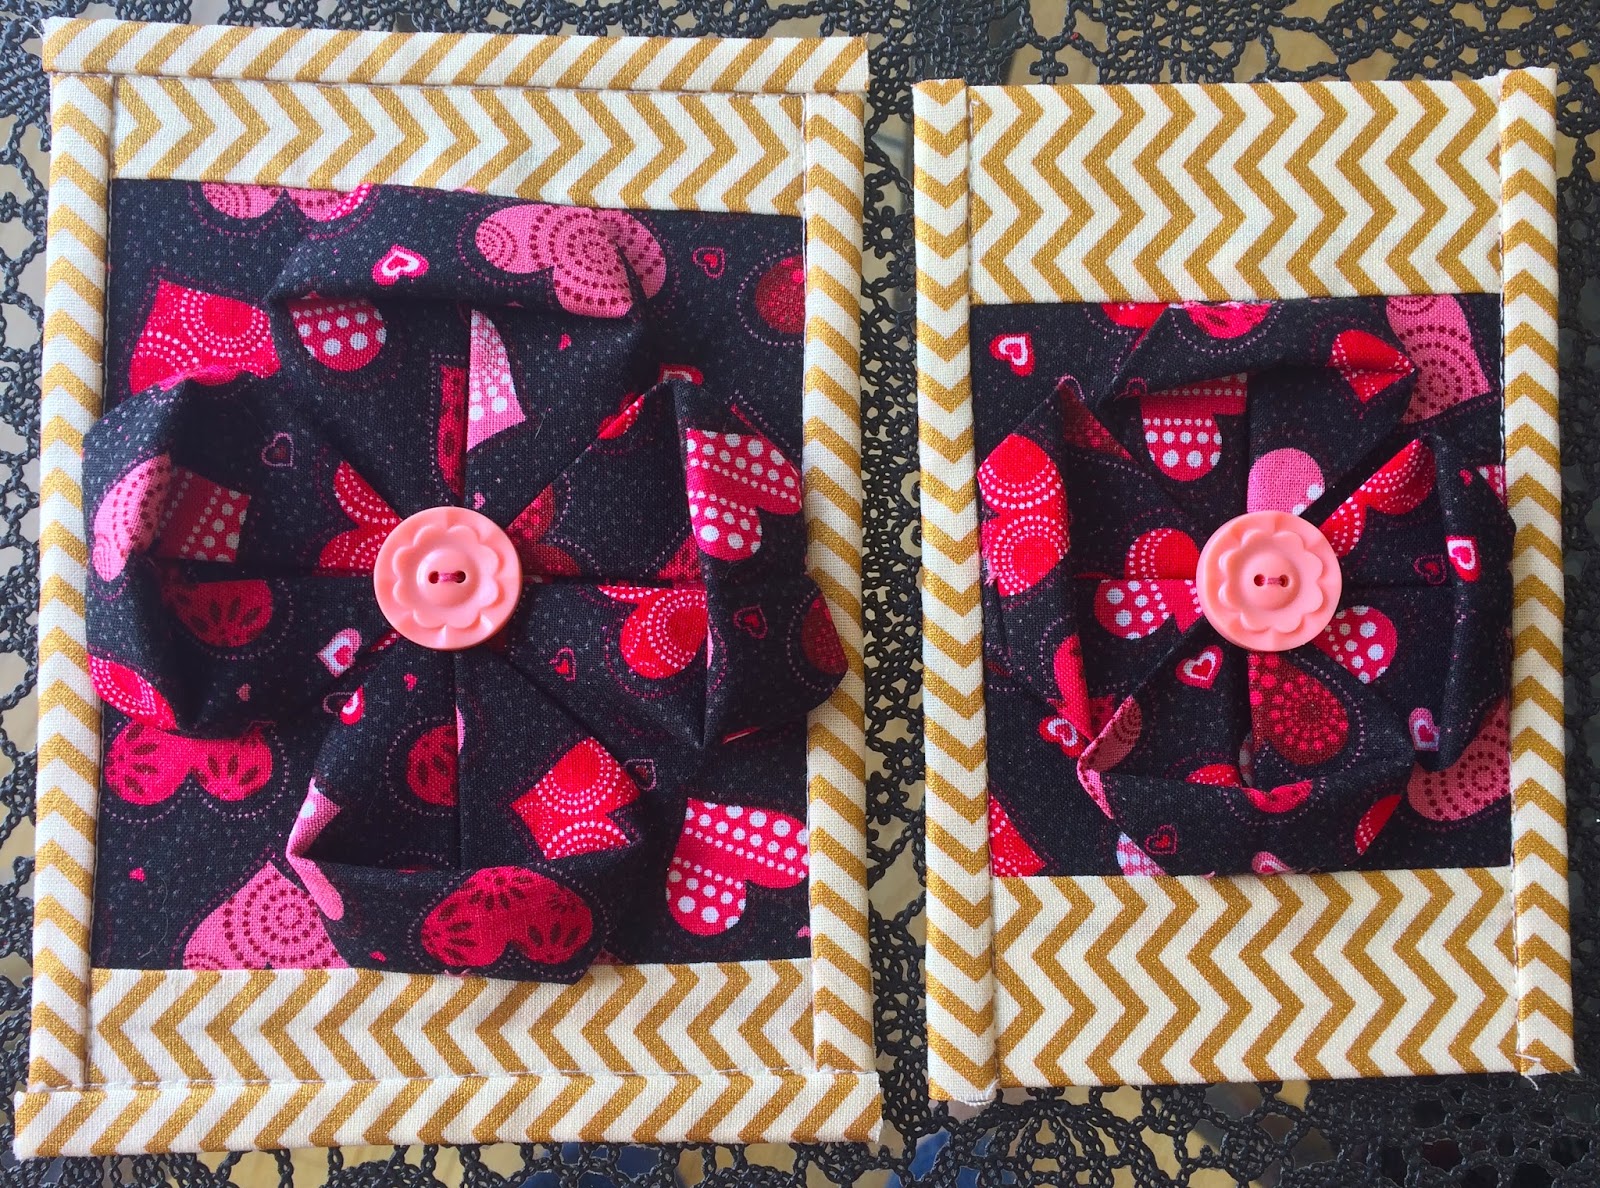
| Image 1 Valentine Purple Petals are in 12-3-6-9 o'clock positions and flattened then secured into the binding seams. Folded Flower block was set at top half of postcard allowing a bottom black band |
 |
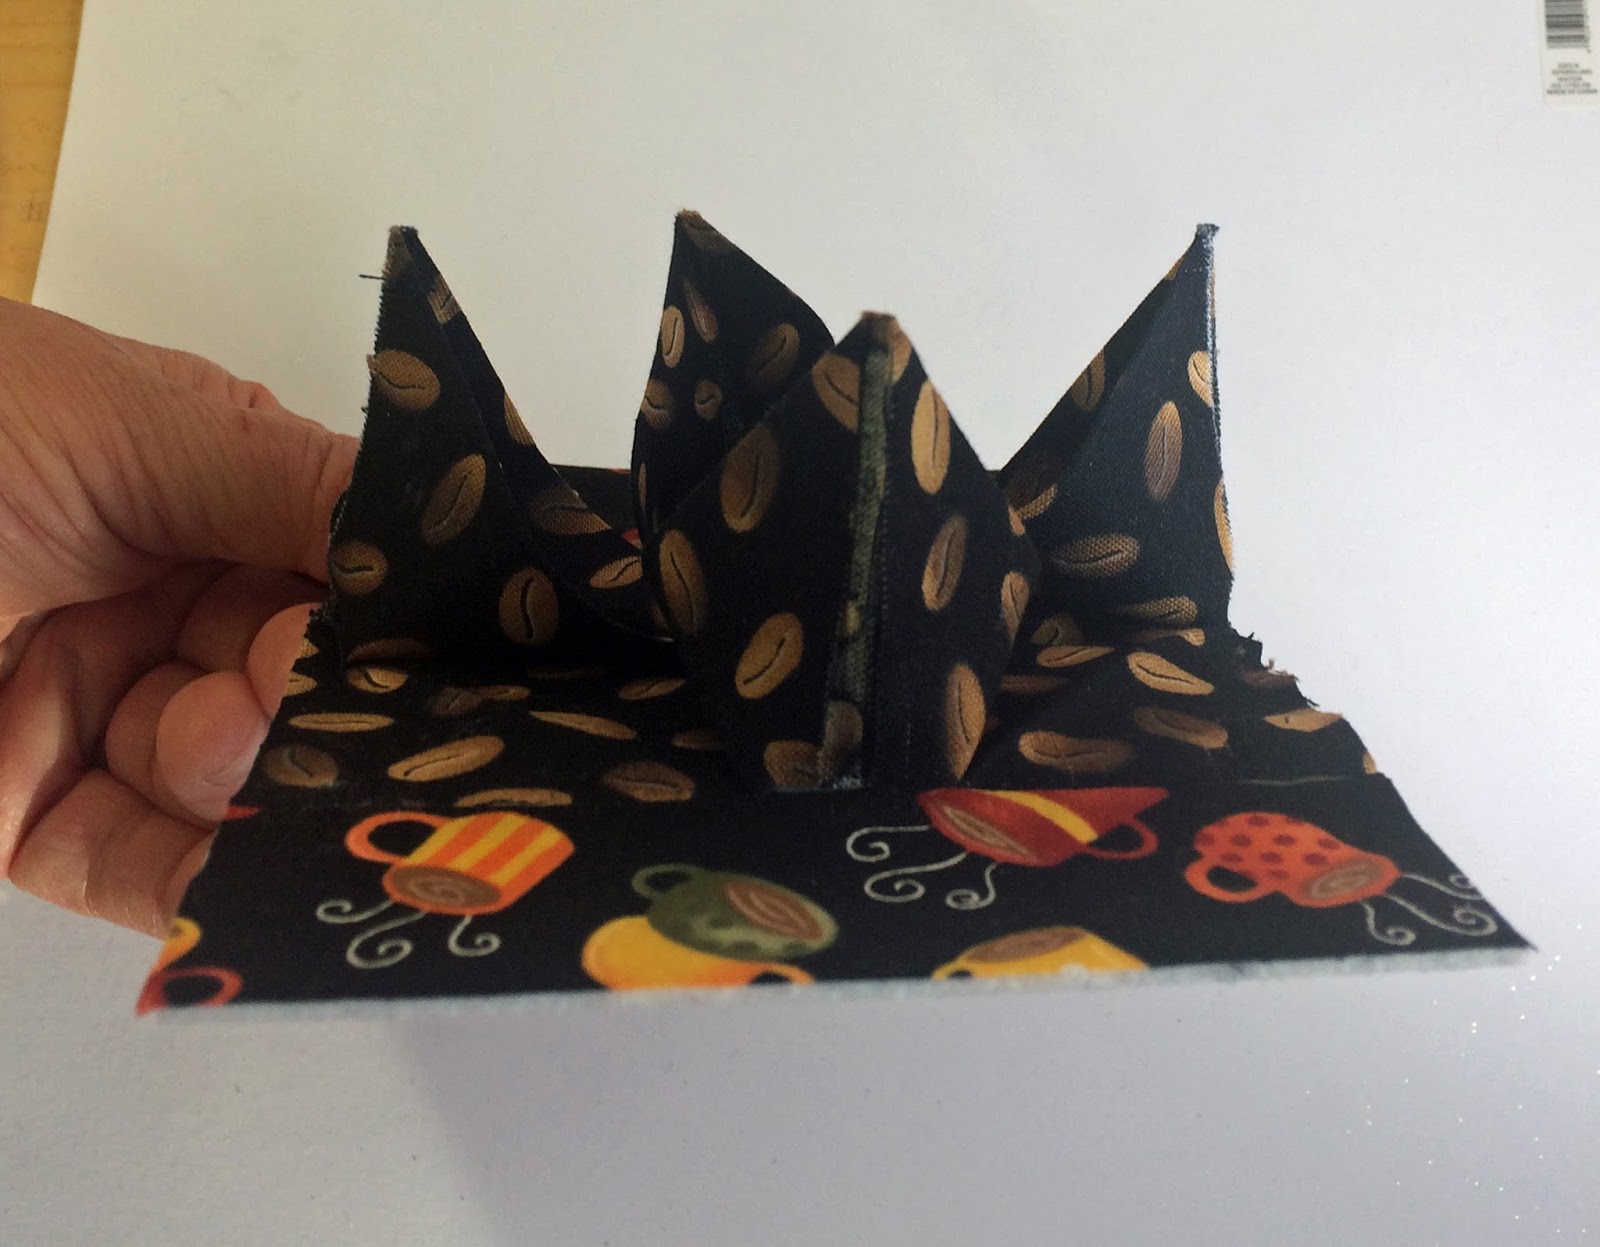
| Image 2 Coffee Canisters Petals were left free in this example |
My inspiration came from a blog called Sewn Up by TeresaDownUnder. She has a tutorial section on her blog called "41 Fabric Manipulations" and it is enjoyable! Her site is full of dimensional quilt blocks and tutorials on folding, pressing and stitching methods. I used her Block #20: Origami Flower.
I don't want to re-invent the wheel so I suggest you review and practice by watching her tutorial video a couple times. Then come back for methods to turn your Origami flower into a FPC. Here is the helpful You-Tube Video on Block #20 by Teresa.
TeresaDownUnder starts with a 10.5" fabric square in her tutorial, but it is too large for our postcards. After testing, I eventually reduced my starting fabric square down to 8 1/2" for the sake of fitting onto a standard 4"x6" postcard. However, I suggest that you learn the technique, by starting with a folded sample made from the demonstrated 10.5" size. Perfect it first, then move down to the more challenging 8 1/2" fabric square.
 |
| Image 3 Left is made from 10.5" starting fabric square which yields a 5x7" postcard Right is made from a 9" starting fabric square which yields a 4 1/4" x 6 1/4" postcard These petals were rolled under and stitched to secure in place |
 |
| Image 4 - Side profile shows dimension |
- Leave the petal edges free (see Image 2)
- Roll the petals under and secure stitch (see Image 6)
- Flatten and secure into edge bindings (see Image 1)
Rotate the folded Origami square so the petals lay either:
Changes I made that differ from the video:
- Square to the postcard edges (see Image 1)
- Diagonal to the poscard edges (see Image 5)
 |
| Image 5 Valentine Red Petals in the 1-5-7-11 o'clock position by rotating the flower block and the petal tips are kept free. Flower block centered on FPC with two rows of grosgrain ribbon on each side of it |
 |
| Image 6 Valentine Black I rolled each petal edge under then secure stitched in place |
- I reduced starting fabric square to 8.5" in order to yield a 4"x6" finished size
- I fused tiny pieces of webbing inside each petal point (see image 6)
- Sometimes I tear my squares to keep on grain, but you could use a rotary cutter
 |
| Image 7 Fuse down eight points with small amount of fusible webbing to secure points |
Construction Steps:
1. Press and make a folded flower from 8 1/2" fabric square
2. Fuse webbing inside eight petal points (4 points x 2 sides)
3. Open flaps and secure middle of flower with a sewn button
 |
| Step 1 |
4. Cut a 4 x 6 piece of stiff stabilizer - I use Peltex 70
5. Decide where you want your flower located on stabilizer (centered vs. top or bottom)
6. Pin it in place
 |
| Step 4 testing a square layout |
 |
| Step 4 alternate diagonal layout |
7. Sew flat grosgrain ribbon to hold flower in place on the stabilizer or
8. Stitch and flip coordinating fabrics to secure it to the stabilizer
 |
| Step 8 diagonal setting |
 |
| Step 8 diagonal setting |
 |
| Step 8 squared setting |
 |
| Step 8 squared setting with flower at top position of postcard |
9. Trim excess fabrics then topstitch around perimeter
 |
| Step 9 trimmed to 4"x6" before topstitching perimeter Keep petals out of the way |
10. Prepare a postcard backing and fuse it backside
 |
| Step 10 |
11. Decide an edging method (satin stitch, decorative stitch, binding)
 |
| Decorative Stitched Edge |
 |
| Partial Binding |
12. Gently shape flower petals by pushing petal upward and tips downward
 |
| Image 8 For a Coffee Themed Swap at PostcardMailArt on Yahoo Groups |
 |
| Image 9 For a Coffee Themed Swap at PCMA |
~ ~ ~ ~ ~ ~ ~ ~ ~ ~ ~ ~
Thanks for stopping by!
Another of my Blog Posts you might enjoy:
Writing on the back of your Fabric Postcards


