Sheree McKe
sewfabsew.blogspot.com
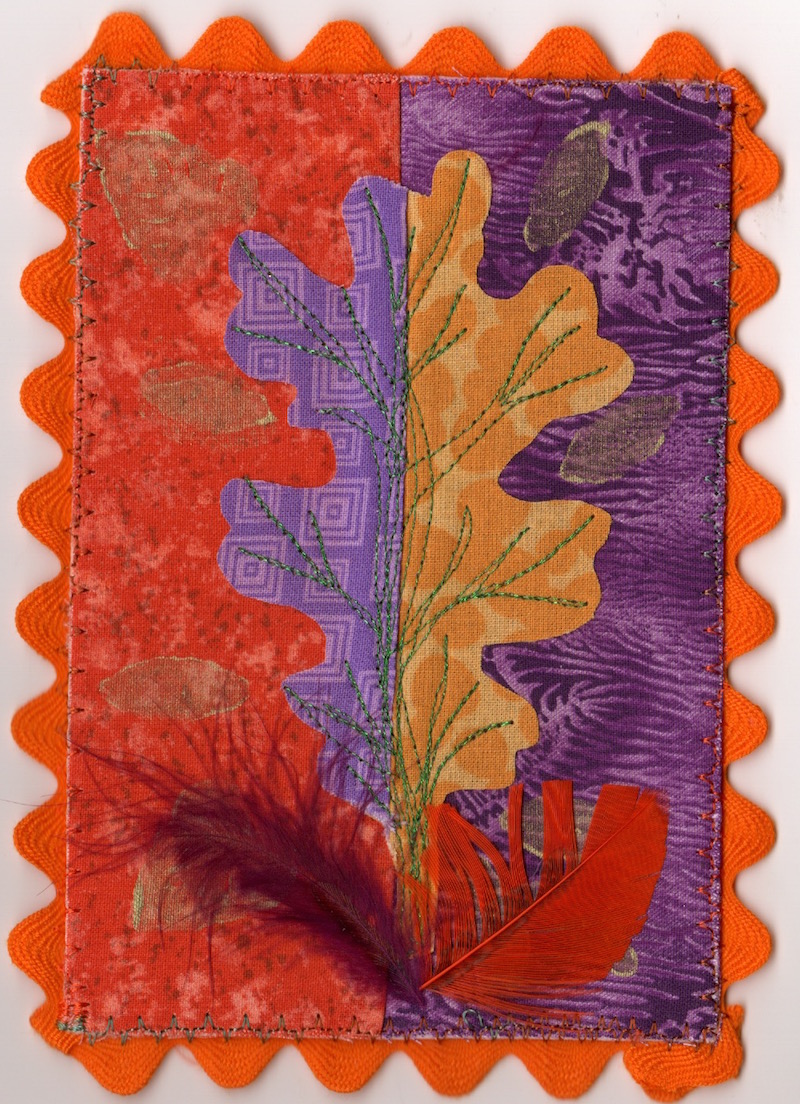 |
| I used a metallic green thread to sew the leaf veins on #1 |
Supplies: Four colors of cotton fabric, fusible web, fusible stabilizer, metallic or variegated thread, large rick-rack, feathers (optional embellishment)
We recently had a challenge titled "Fav Two Colors" at my Postcard MailArt group. I am attracted to contrasting colors, so purple and orange are one of my favorite combinations.
Since it is fall here in Michigan, I decided to use an Oak Leaf theme. The leaf template provided is 3.5" x 5' to fit on a 4x6" postcard. Click on image to download it.

TEAR 3" crosswise strips of four cotton fabrics. I used a dark and light purple and a dark and light orange. If you use a full crosswise tear of fabric, you will have enough to make three postcards.
STITCH the lights together with 1/4" seam, and stitch the darks together, press seam to one side.

PREPARE (one to three) front postcard bases, by fusing the dark strip combination to stabilizer (center of postcard sandwich). I trim these down to 4x6" at a later point.
TRACE oak leaf onto right side of paper-backed fusible web. FUSE the leaf image to wrong side of strip and directly down center seam. Use which ever color combination of strips you desire. I used the light tones for my leaves and the dark tones for my backgrounds.

 |
| Fused to wrong side of light fabric combination |
CAREFULLY FUSSY CUT the oak image and tear-off the paper backing. CENTER the two-tone oak motif directly over the center seam of your prepared front. PLAN AHEAD so you can alternate the light side of leaf on top of dark background.

EMBELLISH your leaf with stitched veins. I used metallic threads on two of them, then switched to a variegated thread.
I also used a small rubber stamp to apply some metallic leaf images, but I did not like the end results.
 |
| Copper metallic veins on #2 but this delicate thread kept breaking and causing trouble |
 |
| Variegated stitching on #3 was much stronger thread |
FINISH BACK by fusing a backing fabric. Here's a tip, you can use the right or wrong side of fabric. Beware of too dark of backing fabrics as it is hard to read the text writing.
 |
| Wrong side of fabric on left, gives a better writing surface |
LAST - I couldn't resist apply a few small feathers with fabric glue for a little fluff!
~ ~ ~ ~ ~ ~ ~ ~ ~ ~ ~ ~ ~
Links to more of my Fall Themed Fabric Postcard Ideas: