October 2014
Sheree McKee
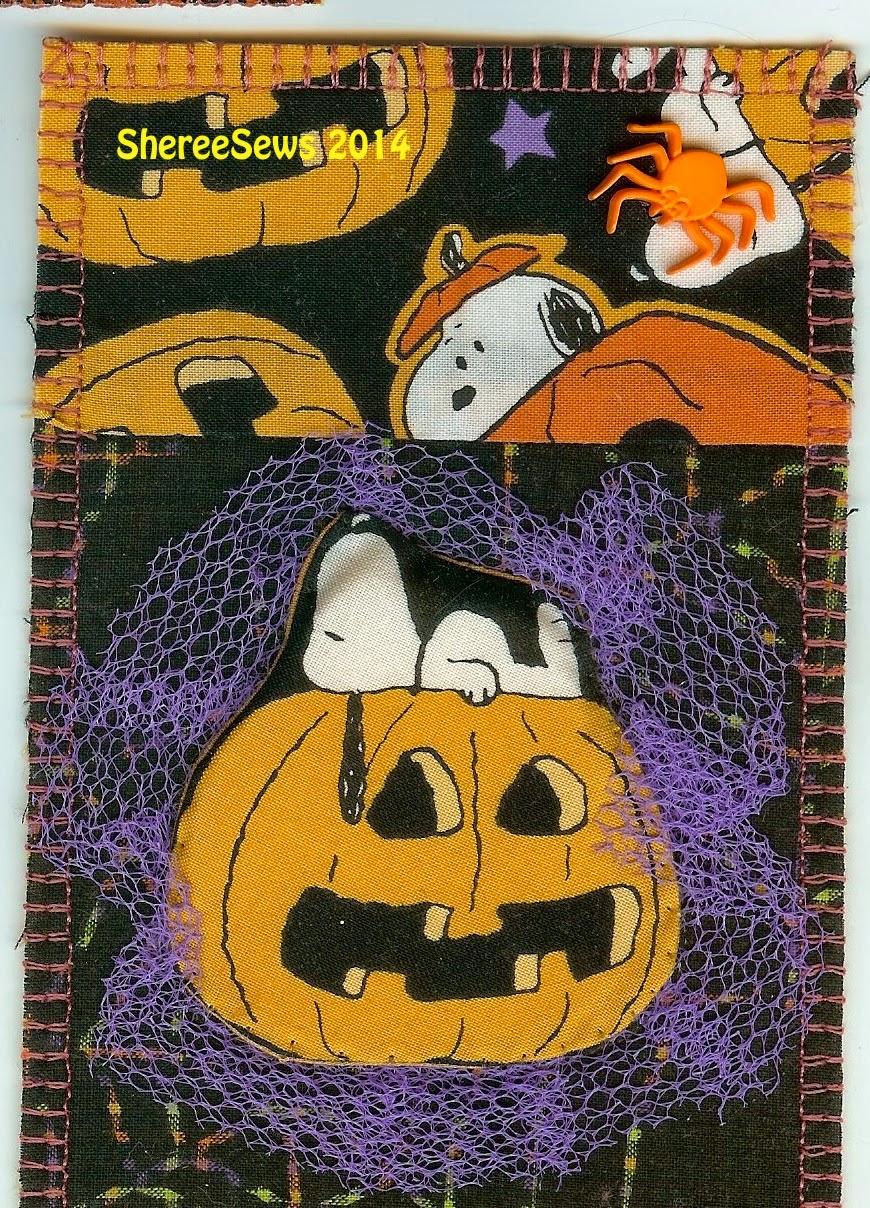
These fall-themed fabric
postcards (FPC) feature fluffy little pumpkins surrounded
by a ruffle of
netting. You can use any seasonal fabric motif
that is
approximately 2”x2” in size.
Supplies: motif fabric, solid liner fabric, pinch of
polyester batting, 3”x14” netting
or tulle, monofilament thread,
theme button or embellishment,
interior stabilizer or stiffener
1. Prepare both sides of a 4”x6” postcard front
that is
fused to a stabilizer support.
I
have selected two prints, divided into 1/3 and 2/3 proportions for front.
Also fuse your back liner in place at this
time.
2. Select any motif fabric where the designs
are at least 2” in size and can be
successfully trimmed around. Also select a solid color coordinating lining
that can be
used to back the motif and on the address side of FPC.
3. Place a square of lining on top of your
motif and pin in place. Right sides should
be together. Make sure lining is larger
than the design. Trim both layers.
Flip over and stitch around the entire motif
using 1.5 stitch length.
Overlap your
stitches at start and end. Do not leave
any opening.
4. Trim with pinking shears very close to
perimeter.
The pinking wedges allow a
smooth edge when turning and
prevent puckering if trimmed closely.
5. Separate the two fabric layers
slightly. Carefully cut a 1 ½” slit into
the lining layer only. This will create
a pocket area for turning and stuffing.
Turn, smooth all curves, and press your motif.
6. Stuff lightly with soft poly batting. Do not overfill the stuffed motif.
No need to stitch the slit closed, as it will
be hidden.
7. Fold 3”x14” netting lengthwise in half. Run a basting stitch along fold area.
Gently gather and tie off in a circular shape
ruffle.
8. Choose a placement for the ruffle and pin or
gluestick into position.
Keep away from
edges of postcard. The ruffle can
completely circle your
motif or partially surround it. You decide!
9. Cover ruffle with your puffy fluffy motif
pillow! Pin in place.
10. Thread machine and bobbin with monofilament
thread.
Select a utility stitch to sew
around motif and occasionally zigzag or catch the pillow.
Your stitches should be small and close. See back above.
11. Finish FPC edges with your favorite
decorative stitch.
Embellish as desired
with a spider button or decorative accent.